Important! Look at the information on this page before viewing the SNP microarray video tutorial. The quick start page has been updated to reflect this information.
- The tutorial video was made using Case It v606, an earlier version of the software. Case It v704 uses a different method to load and run SNP microarrays, so use the procedure below rather than the one described in the video.
- The NCBI databases have also evolved since the SNP microarray tutorial was produced, so when Case It automatically opens NCBI pages the format and features will be different than what is shown in the tutorial (14:20 to 20:38). Basic principles are the same, however.
Case It v704 has some additional buttons on the silver button bar, as shown below, but the Chip button is still used to open a SNP chip file.

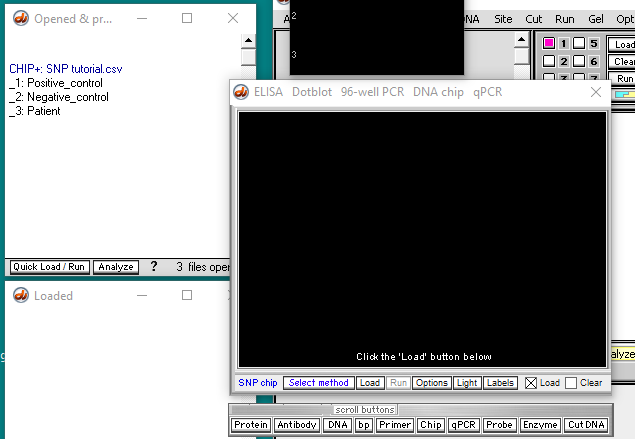
Open the file SNP tutorial.csv that is inside the folder Cases -> Microarray cases -> SNP microarrays -> SNP Tutorial.

Components of the file are visible in the Opened & processed window, but the microarray is not loaded yet (in the older tutorial used in the video, the microarray loads as soon as the file is opened). With Case It v704, you need to click the Load button, as indicated by the white message above the button.

Yellow dots appear (called ‘features’). Only 64 of the possible 96 dots show up, because that is the amount of data in this particular file.

In the video tutorial (that uses Case It v606), the Run button is used to run the microarray. With Case It v704, that button is inactive, so you need to click the Chip button and select Run chip. The microarray will appear, with thumbnails above it. You can either click a thumbnail or a line in the Opened & processed window to see chips for the positive control, negative control, or patient.
Other than these differences, the operation of the SNP microarray is the same as that shown in the video tutorial, so you should watch that for a detailed description on how to interpret SNP microarrays.

